6 Day Iceland Winter Itinerary
Hello! Welcome to my first blog post! Thank you so much for being here. I visited Iceland for the first time in June of 2021 and absolutely fell in love with the country. Iceland was my first European country I visited so it holds a special place in my heart. In this guide you will find my 6 day itinerary and tips for visiting Iceland in the wintertime. If you love going on trips but hate planning them - this guide is perfect for you! I have planned out everything for you so you can focus on enjoying your vacation, and leave the planning to me.
*** Before we get started - In this blog post there are affiliate links, which means if you purchase through one of my links or use one of my codes, I will get a commission at no extra cost to you. With that being said, everything I reference in this post are the REAL businesses/services that I used and paid for on the trip. I was given nothing for free in exchange for promotion. I simply just signed up for an affiliate link after the trip. Everything mentioned in this post are my real and paid for experiences with honest opinions. ***

Table of contents
Finding the best flights
Phone Data/Service
Gas
Daylight Hours
Packing
Arriving at Keflavik Airport / Rental Car
How to see and photograph the Northern Lights (Using your iPhone, Using a DSLR or Mirrorless Camera)
Day 1 - In Reykjavik
Day 2 - Driving to famous sights
Day 3 - Glaciers, Ice Cave, Diamond Beach
Day 4 - Stokksness Beach / Hofn
Day 5 - Driving / Plane Wreck / Vik
Day 6 - Blue Lagoon / Return Rental Car
COST BREAKDOWN (For 4 people!)
Finding the best flights
Here is how to find the best flights to Iceland (and anywhere you want to go). I always use Google Flights to search for the best deal. On the home page click on “explore” and type in your departure airport and then the airport you want to land in, in this case it would be Reykjavik (KEF). DO NOT choose your dates. Instead, choose the “flexible dates” option and let Google Flights tell you the least expensive days to fly. Once you have found both your departure and return flight, be sure to see how long it takes to get there before proceeding. A lot of the time the cheapest options are cheap because it takes a ridiculously long time to get there and may even have an overnight layover. I also recommend choosing an arriving flight that lands earlier in the day as opposed to late at night.
Once you are certain you have found the best flights for your trip, scroll to the bottom and view the booking options. Often it will give you different 3rd party websites to book on like Expedia. DO NOT book with 3rd party websites. Continue the booking on the airlines website. Typically I am all for flying with a carry-on ONLY, however visiting Iceland in winter requires a lot of layers so you may need to check a bag to fit all your winter clothes.
Phone Data/Service
If you do not have a EU based phone plan, you may need to get on a local network so you will have service/data during your trip. The app “Airalo” is a great app where you can download E-SIMS to connect to local networks. The set up is easy but tedious so just select your desired number of GB and follow the steps carefully. You can use my code “SARA0394” for $3 off your first purchase! I have used Airalo in several countries such as Croatia, Montenegro, Bosnia & Herzegovina, The UAE, France, The Netherlands, and even the USA. If you plan to visit more than one European country on your trip, you can purchase a Europe bundle so it can work in all the countries you visit! I found that most of the south coast of Iceland had good service. Using an e-sim does not give you access to receive calls or texts with your personal number. It essentially just allows you to use the internet and social networks. To use your mobile number abroad, you will need to speak with your carrier about an international plan. If you are going abroad for just a short time, I would not recommend purchasing an international plan with your carrier, as it is expensive. To keep in touch with family and friends on Wifi you can use Whatsapp.
You can set up your E-SIM at the airport on the Free Keflavik Wifi Network.
*If you are traveling to more than one country on the bundle then keep in mind when you arrive to each new country you will have to manually switch the network by following these steps:
Settings - Cellular - *click on the e-sim* - Network Selection - Turn off the Automatic toggle - wait a minute - select one at a time until one works*
If you do not want to purchase an e-sim but would still like to use your phone abroad you can purchase a personal hotspot here. This hotspot is great for sharing internet on the go! You can connect up to 10 devices.
Gas
Gas is available all along the South Coast, so you should not have to worry. Just keep an eye on how much you have and do not let yourself get too low. At the pumps, the gas nozzle should be green, so that's how you know you are pumping the right one. Gas is expensive.
Daylight Hours
In January, the sun rises at about 10:30-11:00 am and sets between 4:00 and 4:30. So there is essentially 6 hours of daylight but do not let that turn you away from visiting Iceland in the winter. Even though the sun rises late, the first light starts around 9am and gets gradually brighter until the sun actually comes up. It is the same for sunset… last light is about 5:30 to 6pm. The sun also never goes much higher than just above the horizon so this makes for golden hour lighting all day in the winter. During the summer months the sun sets around 10:30pm and hovers under the horizon for about 3-4 hours so it never gets completely dark.

Packing
Iceland is COLD! Layering is key. You will 100% need a good winter coat for your trip, and a few layers underneath. Gloves, hats, and scarfs are also necessary. The wind can get extremely strong so be extra careful with your hats and scarfs so they do not fly away. Make sure your hat covers your ears, and that your scarf can cover your chin/mouth if need be.
Arriving at Keflavik Airport / Rental Car
Once you arrive at the airport and go through customs (getting your passport stamped) and get your checked bag, head to the bus stop outside the airport. Every 15 minutes there is a shuttle to the car rental offices. We chose Blue Car Rental which is at stop 2 on the bus as of writing and found the process to be quick and easy. We picked up our car and checked for any noticeable damages and we photographed and videoed the outside and interior. You can book through Blue Car Rental by clicking here.
IMPORTANT: I would HIGHLY recommend buying the most coverage insurance possible. Iceland’s weather and conditions can be extremely unpredictable and intense. It is best to have total peace of mind while renting a car in a place with such extreme elements. Also, buy roadside assistance coverage. If you get stuck somewhere it could cost HUNDREDS of dollars/euros out of pocket to get a tow. Especially if you are in a very remote place. Be sure to hold the car doors very tightly when getting in and out of the car, as the wind can literally rip the door off and doors are not insurable.
Also, if you are visiting in the summertime there are sheep EVERYWHERE. They run in the road and if you hit one, it is a hefty 500 EURO fine. Keep a sharp eye out for sheep in the summer and try your very best to avoid them at all costs!
One last thing to keep in mind while driving in Iceland, is that they have cameras detecting speed and if you are caught speeding you will end up with a big fine. So just go the speed limit and you will be fine. The roads are not difficult to drive, as they are pretty flat and straight. Although it is important to keep an eye on road conditions in the winter, as ice/black ice can form on the road. You can check here for the most up to date road conditions in Iceland.

How to see and photograph the Northern Lights
To see the Northern Lights you will need dark and clear skies, as well as minimal light pollution. You can check out this website to see the cloud cover over the island and the intensity of the Northern Lights on any given day.

Using your iPhone
To best photograph the lights on an iPhone, open up your camera and slide up on the screen to view the different settings and then select night mode (looks like a moon). Then slide the timer up to 10 seconds and then aim and shoot but be sure to keep your phone as still as possible. One thing I learned in Iceland is that sometimes the Northern lights look like clouds so it is hard to tell what you are really looking at. This iPhone trick is a good way to tell if what you are looking at is clouds or the lights because your photo will either show gray for clouds or green/blue/red/yellow/pink for Northern Lights.

Using a DSLR or Mirrorless Camera
To capture the lights the best you will need a Camera and a tripod. I shoot with a Canon Mark 5D iii but any camera with the option to change Shutter Speed, Aperture (f) or ISO will do. First, set up your tripod and attach your camera. Then, put your camera on manual focus and look through the viewfinder to point your camera lens at the most distant and visible object you can see. In this case, it will probably be a nearby hotel or cabin light. Manually focus your camera until the light or distant object is completely in focus (this may take a few tries). Once you are focused on the furthest object possible, now aim and shoot the lights on these settings:

Shutter speed (15 seconds)
F (lowest your camera/lens can go, mine is 3.5)
ISO 3200
If you do not have a remote shutter, then you will need to set a 2 second timer delay. This way the pressure and movement of pressing the capture button does not create any blurriness in your photo. The 2 second delay allows for you to let go of the camera and capture the photo with as minimal disruptions as possible. If your photo is too dark then turn up your ISO, or make your shutter speed longer. If your photo is out of focus then you will need to try step one again until you can get a crisp and clear focus in your photos. Try not to get any lights in the photo, like hotel or car lights, as they will be very overexposed (bright) in the photo with these settings.

Day 1 - Reykjavik
Welcome to the capital of Iceland! Your first stop in Reykjavik should be to park your car so you can enjoy the city on foot. Here is a parking garage near the center: Hverfisgata 20, 101 Reykjavík, Iceland, Once parked you can head to the famous Rainbow Road! Walk down the street and enjoy the view as well as the locally owned shops. If you head up the hill you will make it to the famous church known as Hallgrimskirkja.

Next head over to Bæjarins Beztu Pylsur to grab some Icelandic hotdogs (ask for everything on it!) It comes with a variety of sauces as well as crispy and raw onions. They are seriously some of the best hotdogs I have ever had! Keep in mind there is minimal outdoor seating so on really cold days you may have to eat really fast to avoid freezing. For a post-hot-dog warm beverage head on over to Kaffitar, a locally owned cafe with coffee, tea, and pastries with a comfortable sitting area.

If you are a nightlife person and want to hit the town for some dancing, I would recommend Bar KiKi. I met my now boyfriend in this bar, 10/10 magical place! For accommodation, my friends and I stayed at R13 Hotel, however I would not recommend this hotel for more than one night if your main focus of the trip is Reykjavik, since it is a pretty far walk to the city center. We stayed here so we could wake up super early and get out of the city to get an early start on the day for our road trip! It was a nice place to sleep for the night.
Day 2 - Driving to famous sights

It is day two and a driving day! Wake up early and head to the grocery store to stock up on road snacks. Then head to Seljalandsfoss, one of Iceland’s most famous waterfalls. It is approximately a 2 hour drive from Reykjavik to the parking lot of the falls. *Parking at this location is 700 ISK = ~ USD 4.90 at the time of writing* You may know it as the “waterfall you can walk behind”. Unfortunately in the winter the walk-behind path is closed due to snow and ice, however you can get great views from the front. There is another waterfall nearby called Gljúfrabúi and it is walking distance from Seljalandsfoss.

Once you are finished at Seljalandsfoss, drive 30 min to Skogafoss, the most famous waterfall in Iceland. It is quite busy here, especially midday. If you arrive just after sunrise you may get lucky with a rainbow across the falls!
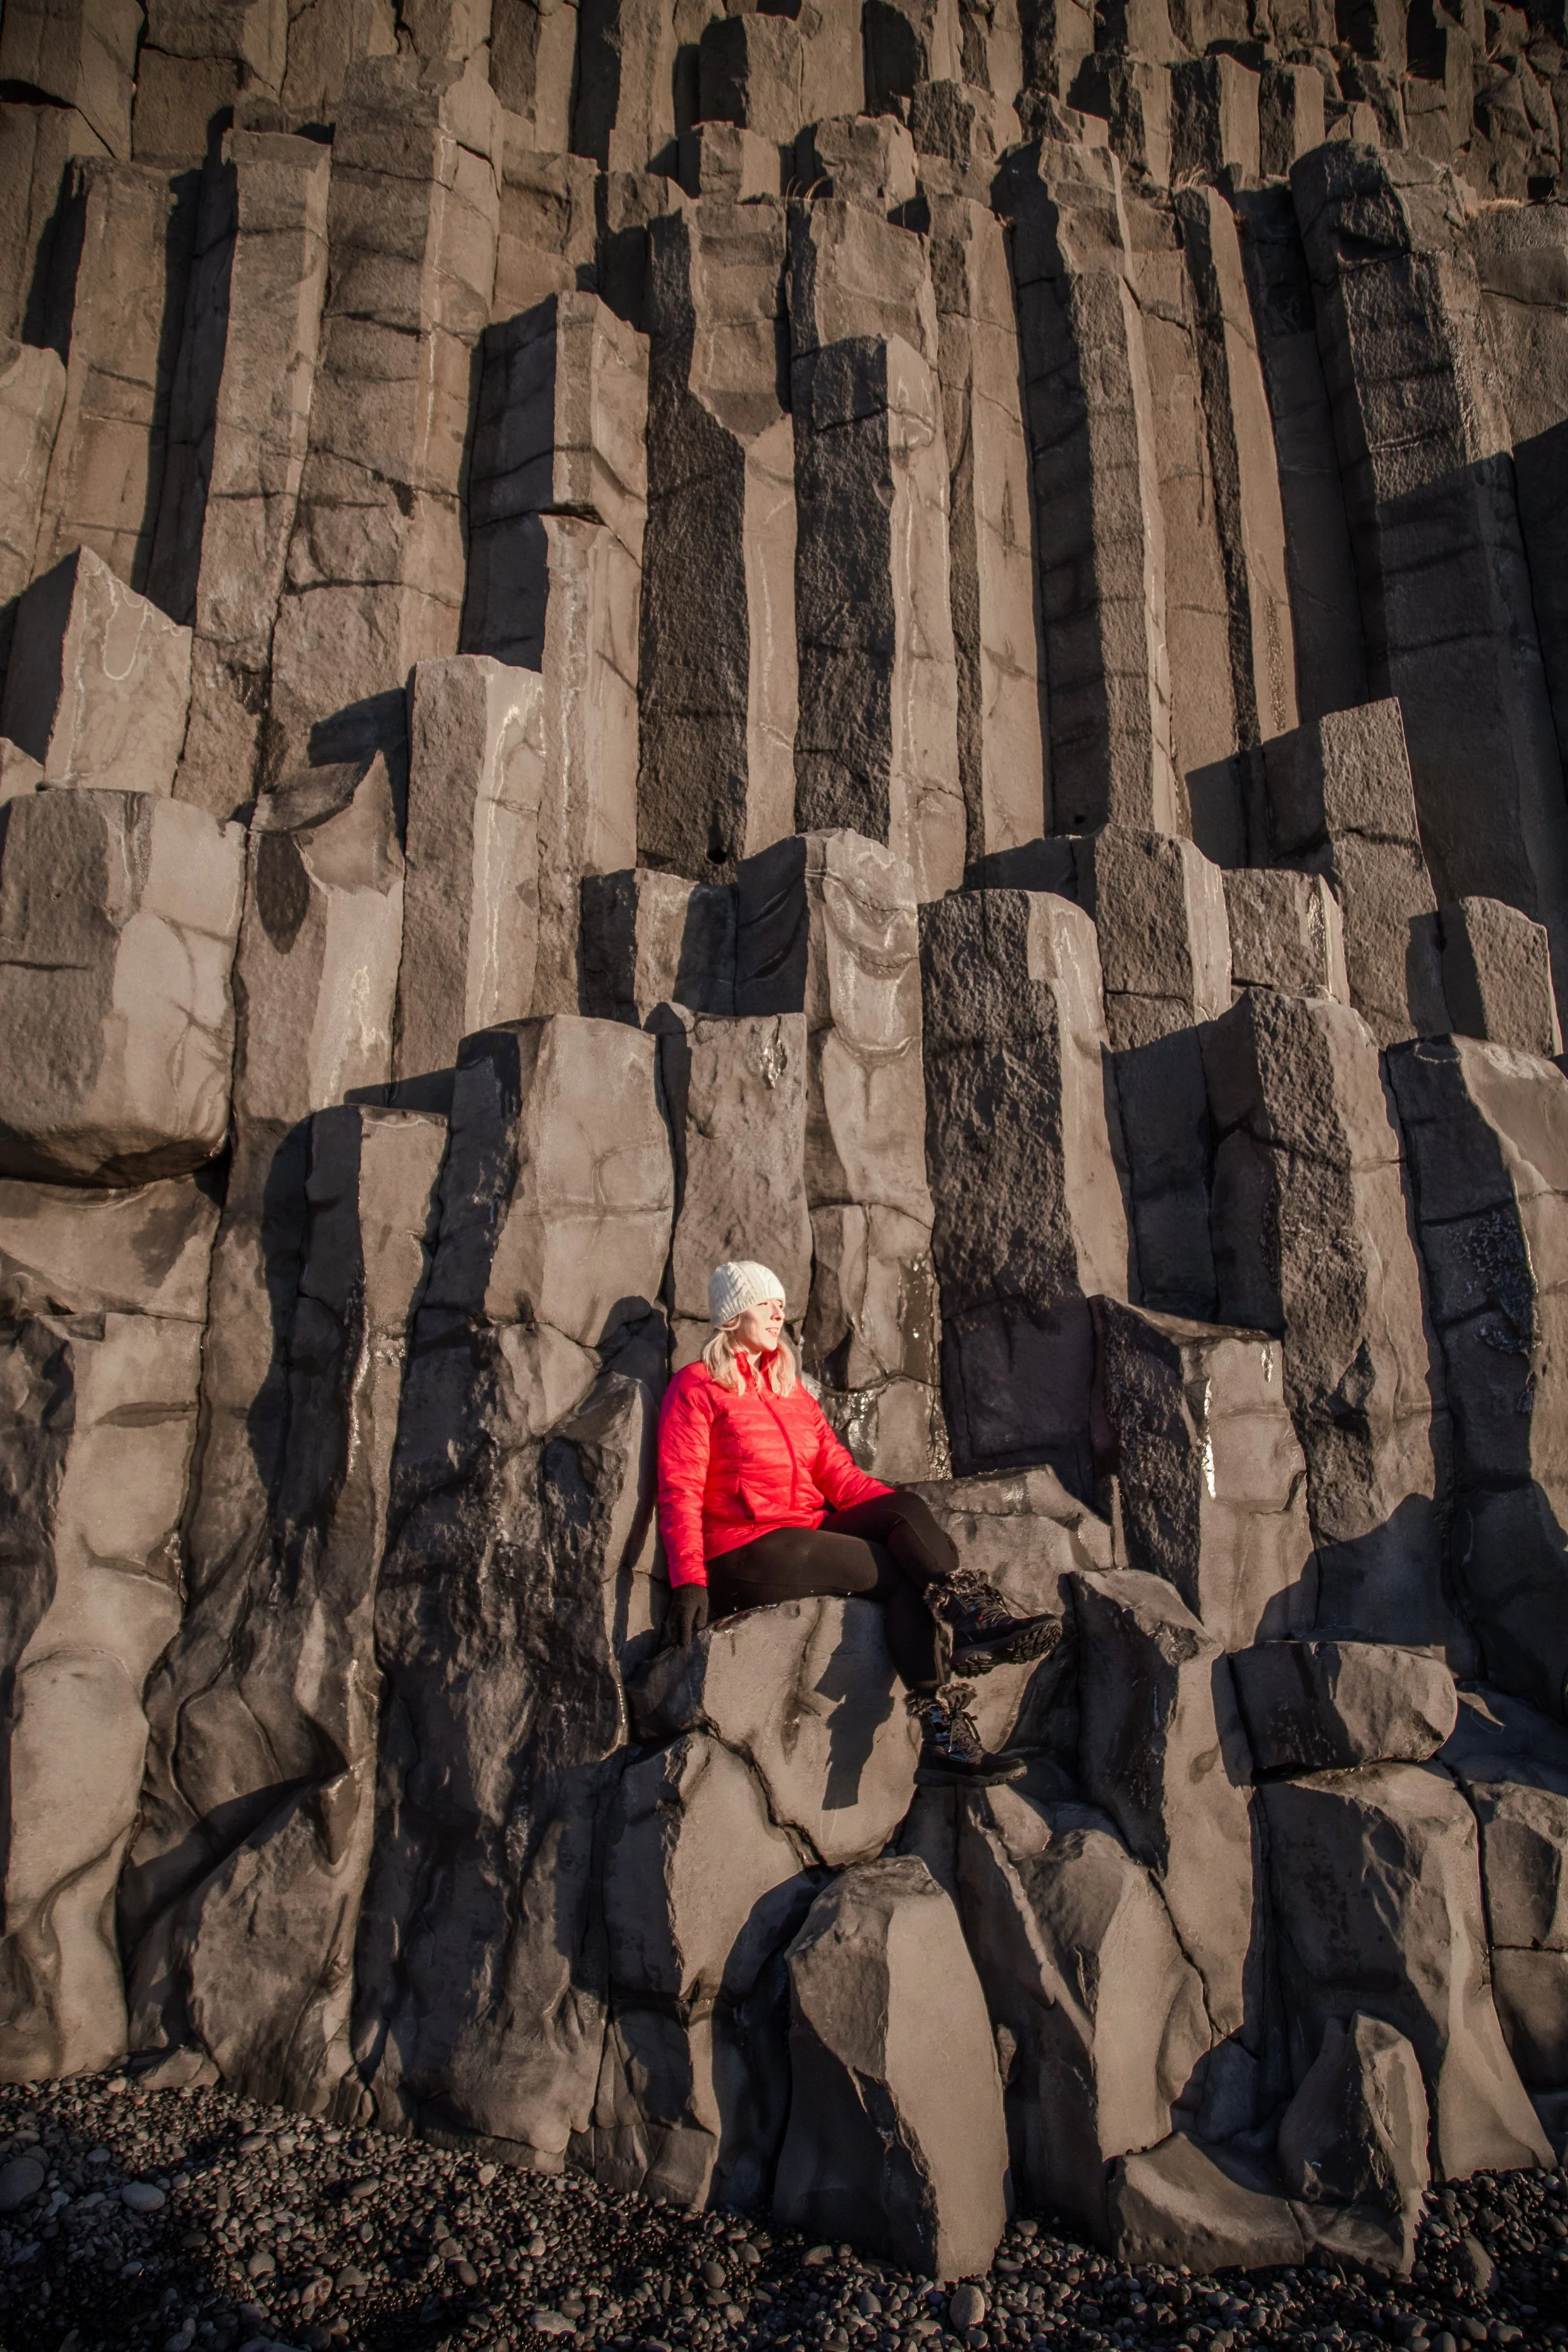
Now it is time to drive to Reynisfjara Beach, the most famous beach in Iceland. After a 30 min drive you will arrive at the parking area and walk the short path to the beautiful black sand. Here you can see basalt callums, black sand, huge waves, and sea stacks. It is a beautiful place but please beware of the waves as this beach is deadly. The waves can come out of nowhere and they will suck anything in their way into the ocean. While my friends and I were taking photos a massive wave came rushing towards us and the other visitors and everyone was panicking and running away as fast as possible. Meanwhile, there was a family standing on a rock with an infant and they did not move! They got extremely lucky that the wave did not pull them out to sea. DO NOT be these people. Be cautious and do not go too close to the water. Iceland’s elements are no joke.

If you still have daylight left, drive 17 min to Dyrhólaey Lighthouse for sunset. Here you can see a long and straight stretch of black sand beach which makes for incredible photos. This spot requires a 30 min uphill hike to reach from the parking area, and of course a hike back down.
After the hike and long day of adventures, you can head over to Black Beach Suites near the town of Vik for a cozy night in. It was here where we got to see the Northern Lights light up the sky! This hotel was PERFECT after a long day of exploring and driving. It was so cozy and beautiful and I had one of the best showers of my life here.
Day 3 - Glaciers, Ice Caves, Diamond Beach
It is day 3 and time to keep driving east! Drive 2 and a half hours to Jökulsárlón, which is a glacial lagoon and the departure for many tours. If you would like to do an Ice Cave tour, I would recommend going with a company called Local Guide. They run an ice cave tour to one of Iceland's massive glaciers.
*Remember to book in advance*

For this tour you will be given the appropriate size crampons, which are spikes that slide over your boots and allow for easy, non-slip walking on ice and glaciers. Once you have your crampons and your helmet, you will board the tallest jeep you will ever see and ride about 30 min through rough and bumpy terrain until you reach the parking lot of the hike. From the parking lot it is a 25 minute hike to the entrance of the cave. This hike has stunning views including waterfalls, cliffs/mountains, and of course the glacier. The inside of the cave is beautiful and the texture of the ice is incredible. The ice is a million shades of blue and you are able to walk around, take photos, and even lick the ice if you want (I of course licked the ice).
After the Ice Cave tour you will return to the original meeting point at the glacial lagoon and you can visit the tiny cafe where they have tea, coffee, some pastries, and of course my favorite… HOTDOGS! They are best with a warm drink after Ice caving.
You can use code “SIGHTSOFSARA10” FOR 10% off your ice tours with Local Guide!

Right across the street from the glacial lagoon is Diamond Beach which is where the glacial lagoon meets the sea, which makes for ice chunks or “Ice Burgs” to end up along the shore of the black sand beach. After visiting Diamond Beach you can head into the village of Reynivellir to check-in to your accommodation. We stayed in a tiny Airbnb cabin. The link for the airbnb is here.


Day 4 and my FAVORITE day of the trip! Wake up with the sun and have a “chill morning” before checking out by 11 and hitting the road for 1 hour. In my opinion, this drive has the most interesting scenery on the trip so far. Head to “Viking Cafe”. When you are about 3 minutes away you may see a pullout on the right hand side with horses! We stopped here to say hi to the horses and take some photos.
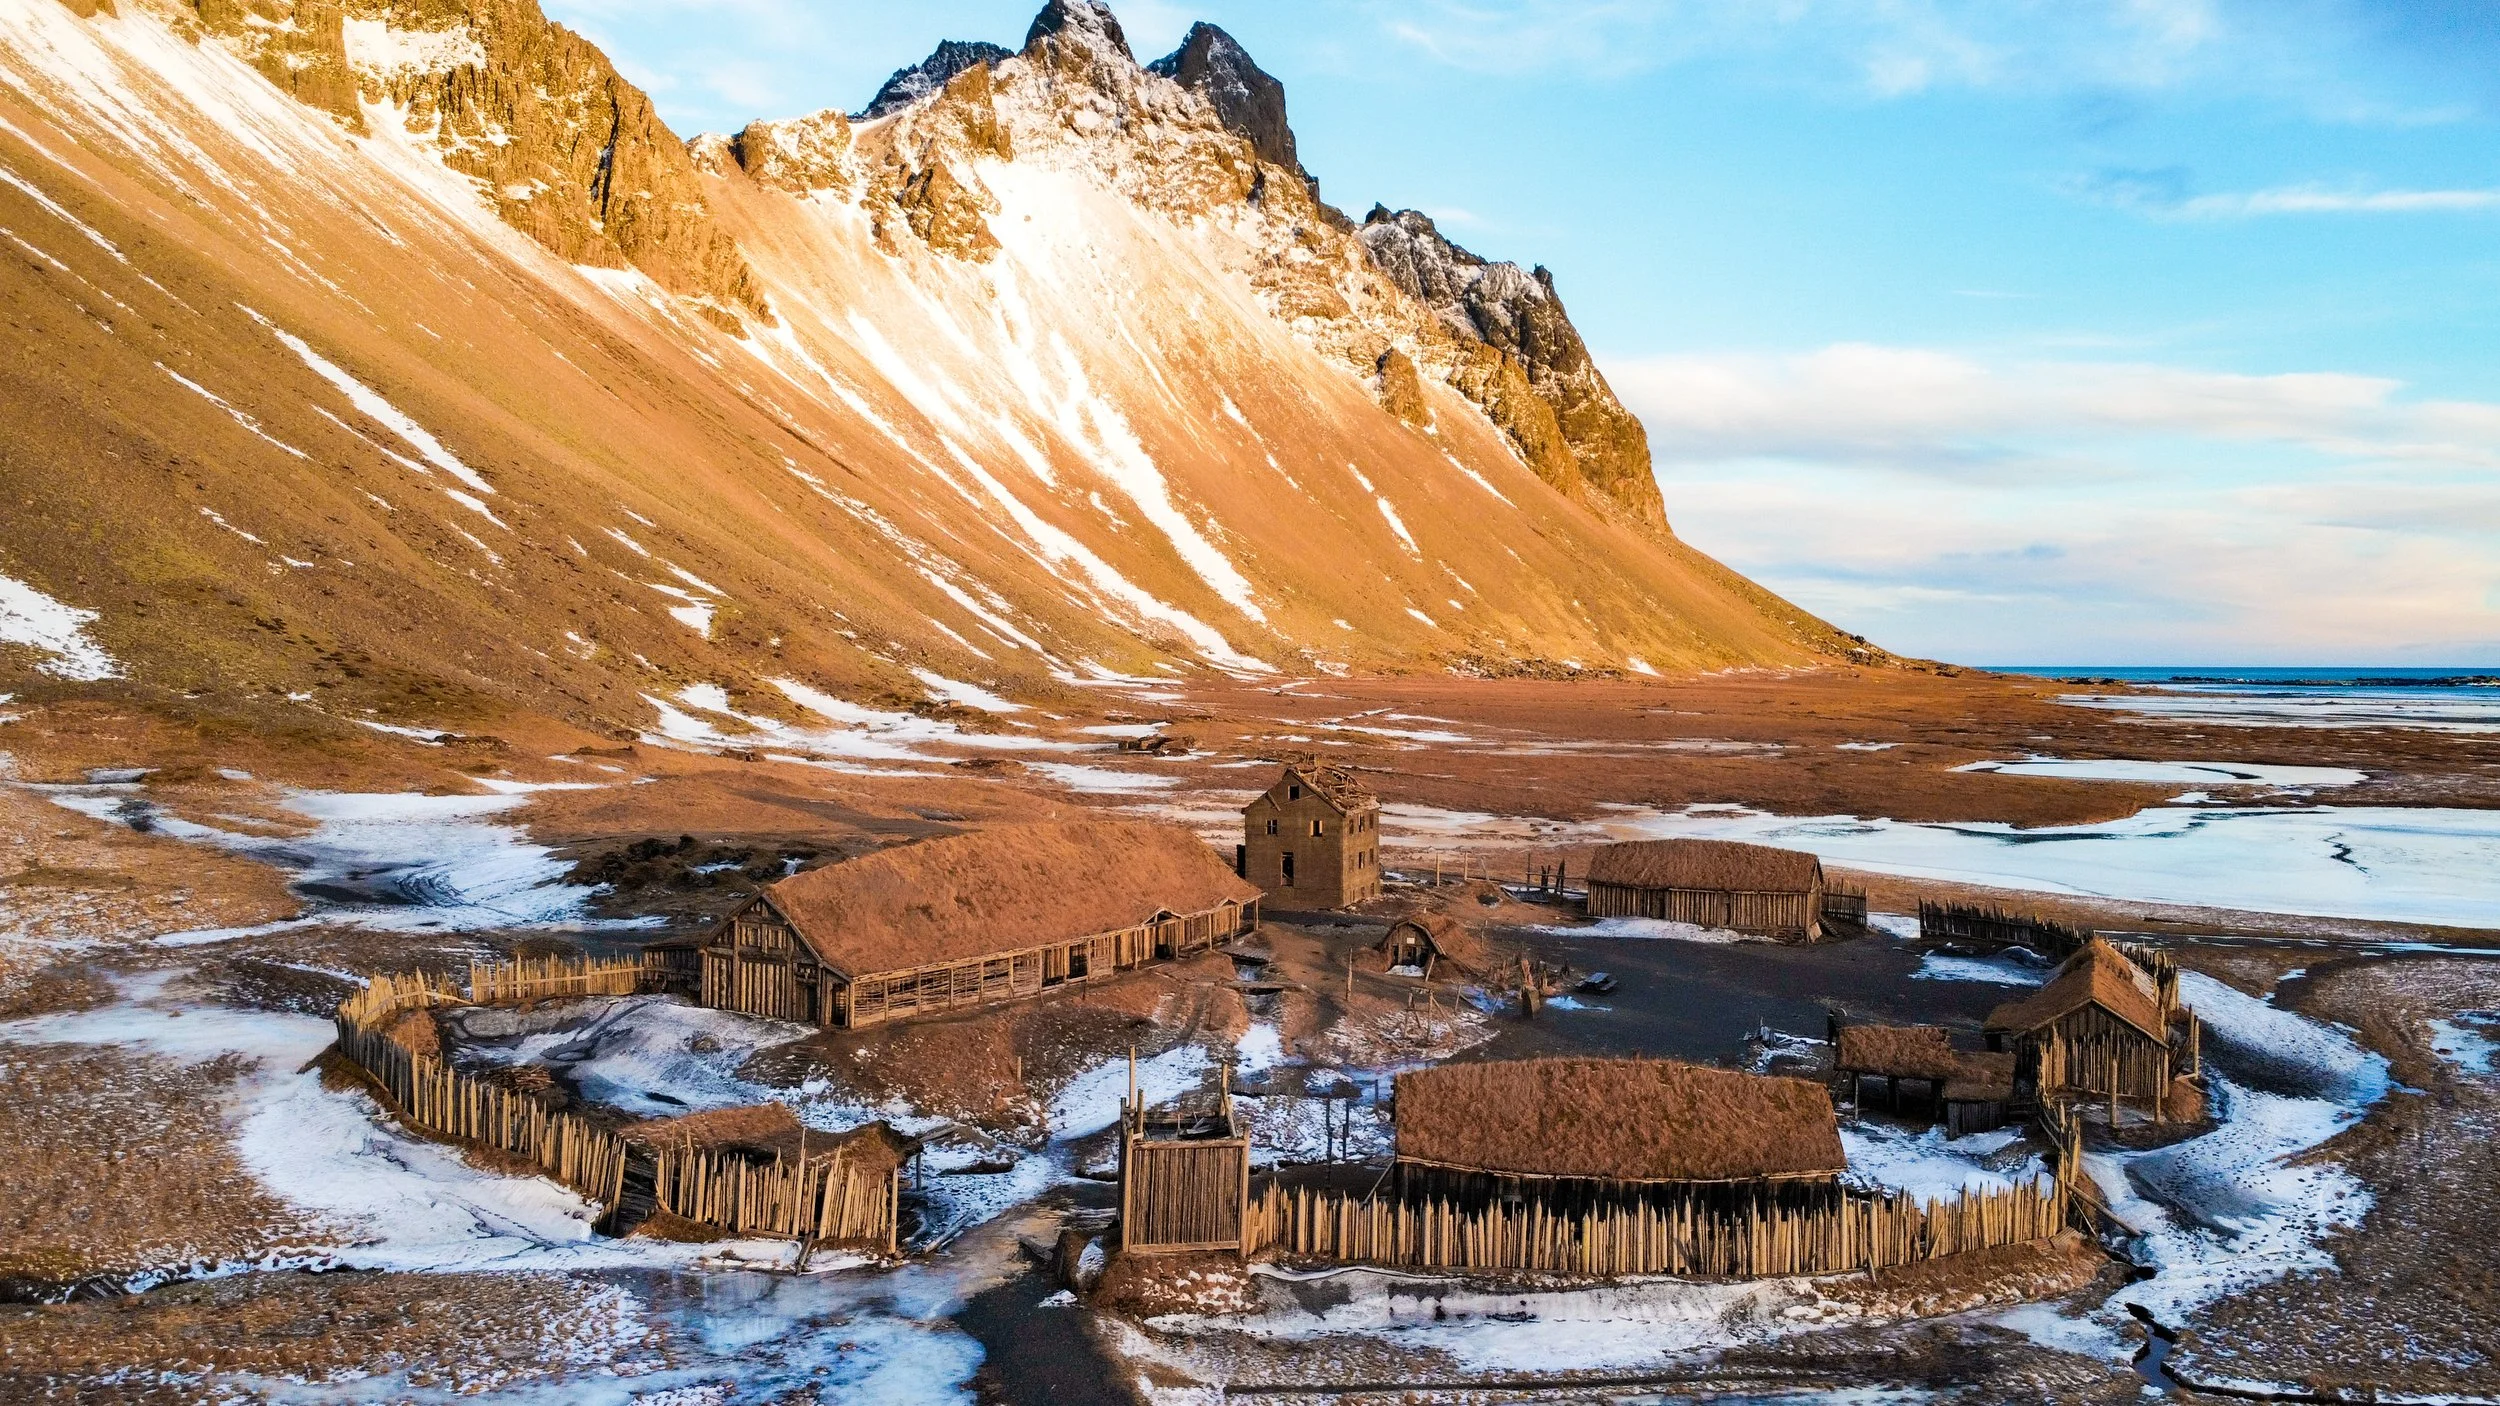
Once at the cafe you can grab a beverage and some breakfast and purchase your entry ticket to the beach. I believe it was about 900 ISK which is USD $6.30. Be sure to ask for a map and get directions for the “Viking Village” which is an old movie set that was built but was abandoned after financial issues with the film production. So now this set sits at the most perfect location in Iceland and is fun to walk around. Once you drive through the ticket gate, the village parking lot is down the first left hand turn.

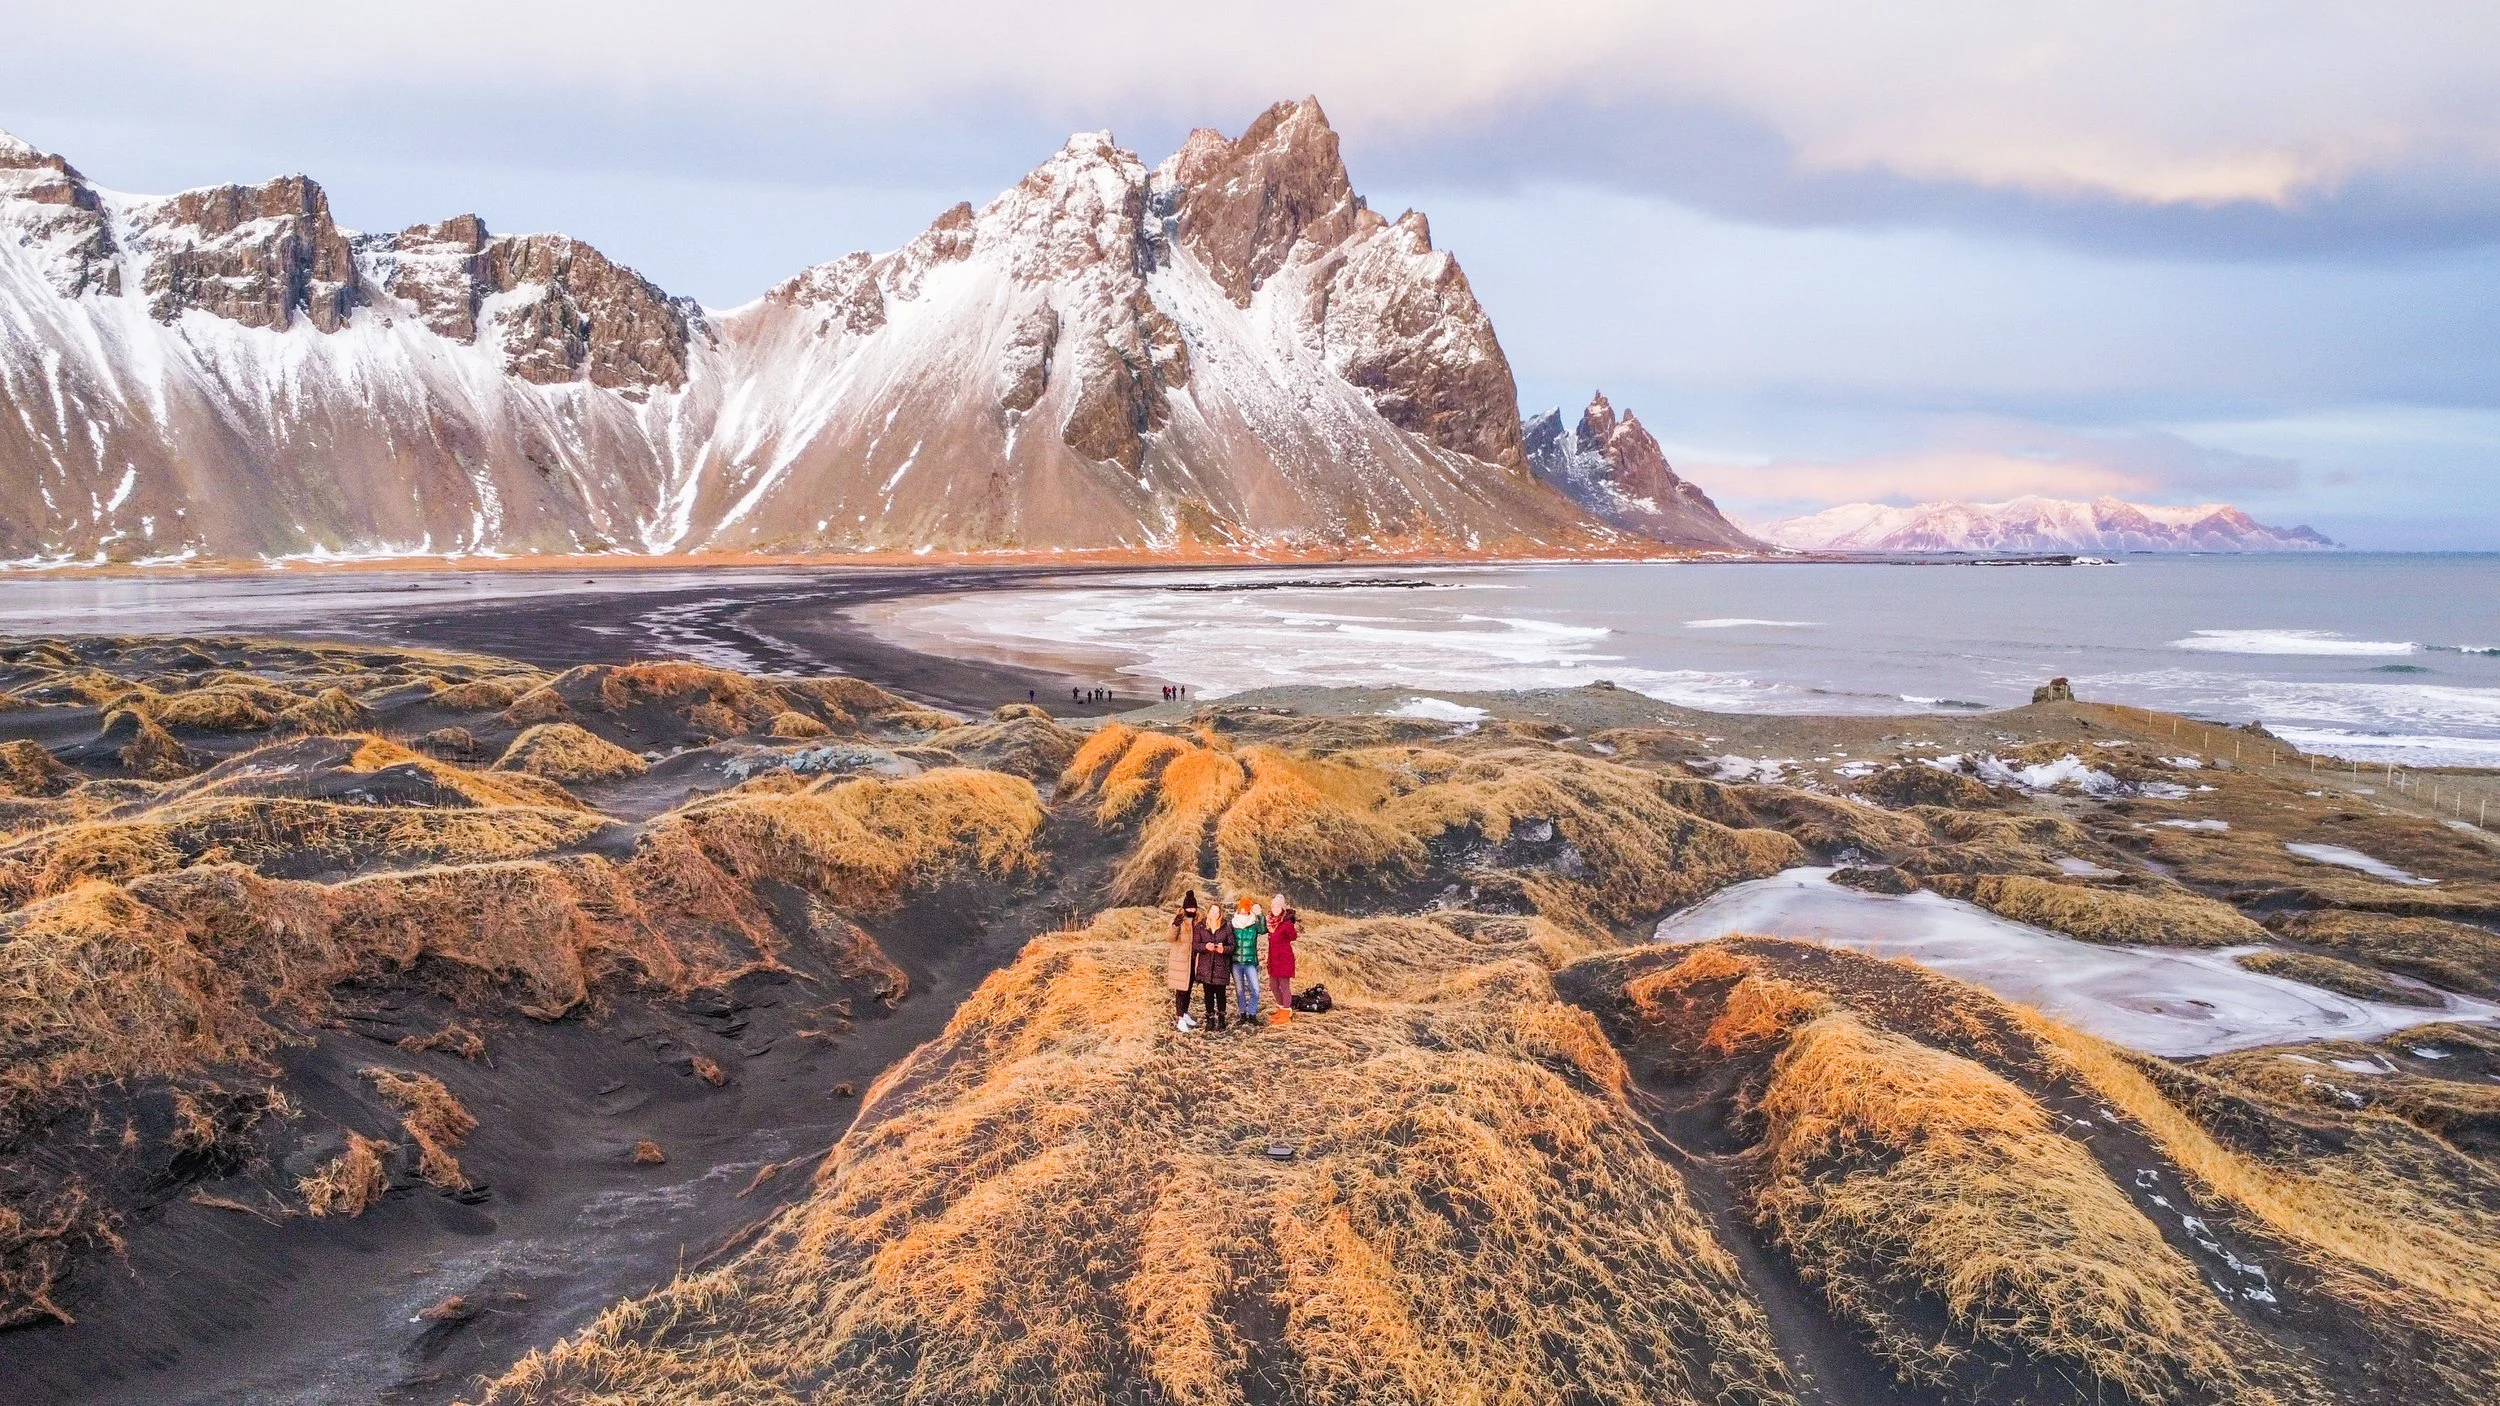
After the village, continue further down the road and park at the very end in the parking lot to access Stokksnes Beach, aka Vestrahorn. This is my FAVORITE place on earth. I truly have never seen such an amazing place. I can't even describe it well enough because nothing I say and no photos can do it justice. It is absolutely magnificent. We stayed here for a few hours, taking in the view and taking photographs from every angle. I would highly recommend staying for sunset, as the colors are so vibrant and the mountain lights up pink on a clear sunny day.

After sundown, head to the town of Hofn for dinner. For an amazing (but expensive) meal, I would highly recommend splurging on the Pakkhus Restaurant, especially if you love fresh seafood. For accommodation you can stay at a nearby hotel called “The Milk Factory” in the town of Hofn, which has free breakfast in the morning. If you are in need of more groceries before hitting the road and heading back towards Reykjavik, there is a grocery store called “Netto” right near a gas station, so you can grab snacks and gas.
Day 5 - Driving / Plane Wreck / Vik
It is a driving day! Getting back to Reykjavik is a far drive so we decided to split it up and drive from Hofn to Vik which is about 3 hours and 20 min. We used this final full day to relax at the hotel. We decided to stay at a hotel called Hotel Vik. If you are not ready to relax just yet, then head out into the town for some exploration and check out the famous church known as the Vik i Myrdal Church which sits on a hill above the hotel and overlooks the whole town. In the summer this spot is known for the classic photograph featuring the church, town, sea stacks, ocean, and lupines. If you want more beach time you can walk down to Black Sand Beach Vik which has a great view of the sea stacks that were also visible from Reynisfjara Beach, which is listed on day 2. Another popular sight nearby is the Super DC-3 Plane Wreck, located 20 min away by car and another 45 min by foot. If you do not want to walk, you can book a shuttle from the parking lot here.

Time flies when you are having fun! For our last day in Iceland, we had late flights (8pm) so we decided to wake up a bit early and finish the drive back towards Reykjavik so we could squeeze in the Blue Lagoon before heading to the airport. For the Blue Lagoon, there are several packages you can purchase. Comfort, Premium, and Luxury. You can find the different options here. My friends and I decided we were just going to do the basic and least expensive package which is Comfort. We paid $83 each, however if you book far enough in advance, the price can go as low as $62. With this package, you get unlimited time in the Blue Lagoon, Silica Mud Mask (that can be found at a walk up station within the lagoon), 1 free drink (alcohol included!) at the walk up bar in the Blue Lagoon, and use of towels, showers, and lockers. I love the Blue Lagoon and I think it is worth the money for the experience. I find it really relaxing and a really unique experience to do while you are in Iceland. After the Blue Lagoon you can drive back to Blue Car Rental to return the car and then take the shuttle to the airport.
COST BREAKDOWN (FOR 4 PEOPLE)
*local prices fluctuate, outcomes may vary*
GAS: We got gas 5 times for a total of $200, which was $50 a person.
ACCOMMODATION: 5 nights in accommodation cost $1,237.38 which was about $309 a person. We could have made this expense less but we splurged a bit on hotels.
EXCURSIONS: For excursions like the Blue lagoon and Ice Cave tour, parking, and entrance fees, came to about $868 for 4 people which is $217 a person.
CAR RENTAL: Our car from Blue Car Rental for the 6 days with total coverage insurance + roadside assistance, came to $726, which was about $181 a person. Local prices fluctuate, outcomes may vary
FOOD: Individual food costs vary. It was an estimated $680 for 4 people which is about $170 for food per person, which is average $28 a day for groceries and eating out per person.
PHONE DATA: An E-SIM for local data and service with the Airalo app for 5GB of Data is $13 each ($52 total for 4 people) use code SARA0394 for $3 off your first purchase with Airalo. Or you can purchase this hotspot for your trip and your whole group can connect!
That brings the total to $3,763 for 4 people on a 6 day trip and if we add in some misc items like souvenirs it roughly comes out to $1,000 per person NOT INCLUDING FLIGHTS.

I am hosting a group trip to Iceland in January 2024! To see more details and sign up for the trip, click here for more info.
You have reached the end of the guide/itinerary! If you found this guide helpful and you would like to support me - my Venmo is @sightsofsara
Thank you so much!